A Simple Use Case
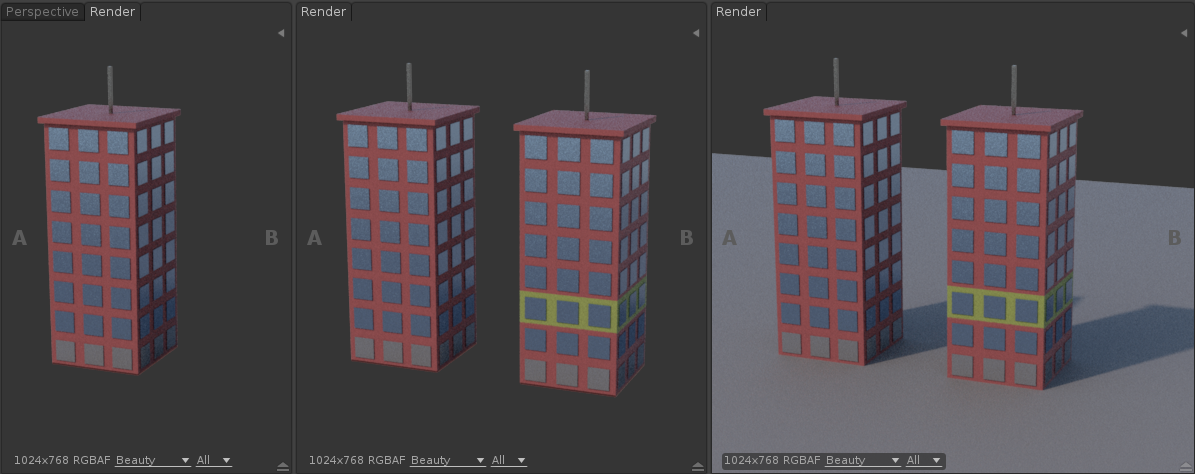
To illustrate this, let's consider the following example:

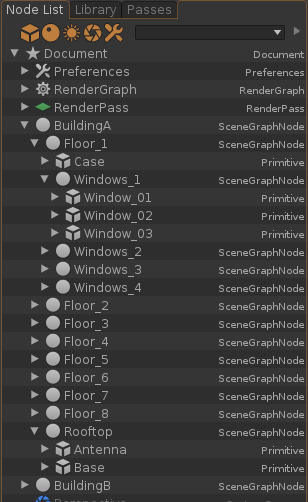
Two identical buildings, consisting of 8 floors with windows, and a rooftop with an antenna.
Using union
To render BuildingA in the BuildingA layer, BuildingB in the BuildingB layer, and both buildings in the Buildings layer, and eventually, both building and Ground in Layer, one can use the union merge mode as follow:

By selecting an object of BuildingA, the RenderGraph highlights as follow (over a highlighted node shows how this node affects the rendering:)

The union nodes merge the visibles layers, so in the end, BuildingA is visible in all BuildingA, Buildings and Layer. The same idea applies to BuildingB and Ground, but with different nodes implied.
Overrides
We want to render the building with a concrete look, but use blueish metal for the windows but for the first floor. This can be done as follow, using override and subtract
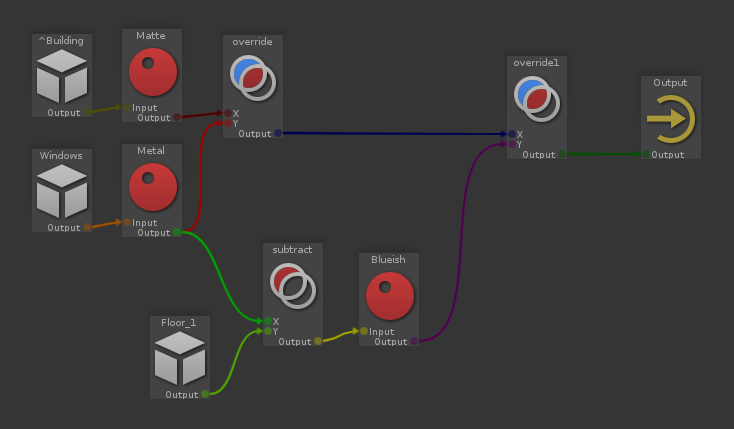
"^Building" (which represents both BuildingA and BuildingB) is shaded with a Matte shader, but Windows are overridden to use a Metal shader (hence the Metal), and Windows but those on Floor_1 have a blueish tint.
When selecting anything but a window, we can see that the 'Metal' node is not active, so non-window objects are rendered using the Matte shader:

When selecting a window, we can see that the 'Metal' node overrides the 'Matte' node, window objects are rendered using the Metal shader:

Eventually, when selecting a window from Floor_!, we can see that the 'subtract' node bypasses the 'Blueish' override. First floor windows are rendered without the blueish tint:

Using intersection
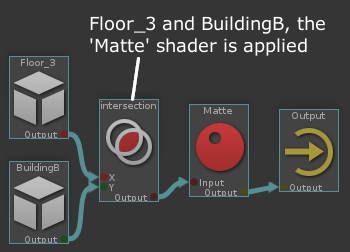
Eventually, we want Floor_3 of BuildingB to have a yelloish color. We use intersection as follow:

Objects from Floor_1 but not from BuildingB don't have the yellowish tint:
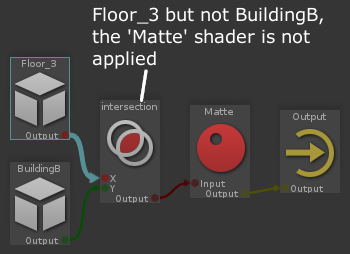
While objects from Floor_1 and BuildingB have the yellowish tint:
Result
Here is the resulting render, with BuildingA, Buildings and Layer render layers: